

Dashboard and Settings
Dashboard and Settings
Introduction
The settings page lets you configure how Luma events are imported, which data is attached, and how API caching performs.
Purpose
Learn how to configure default behaviors for imported events to save time and match your workflow.
Step-by-step Instructions
1. Go to Import Luma > Settings in your WordPress dashboard.
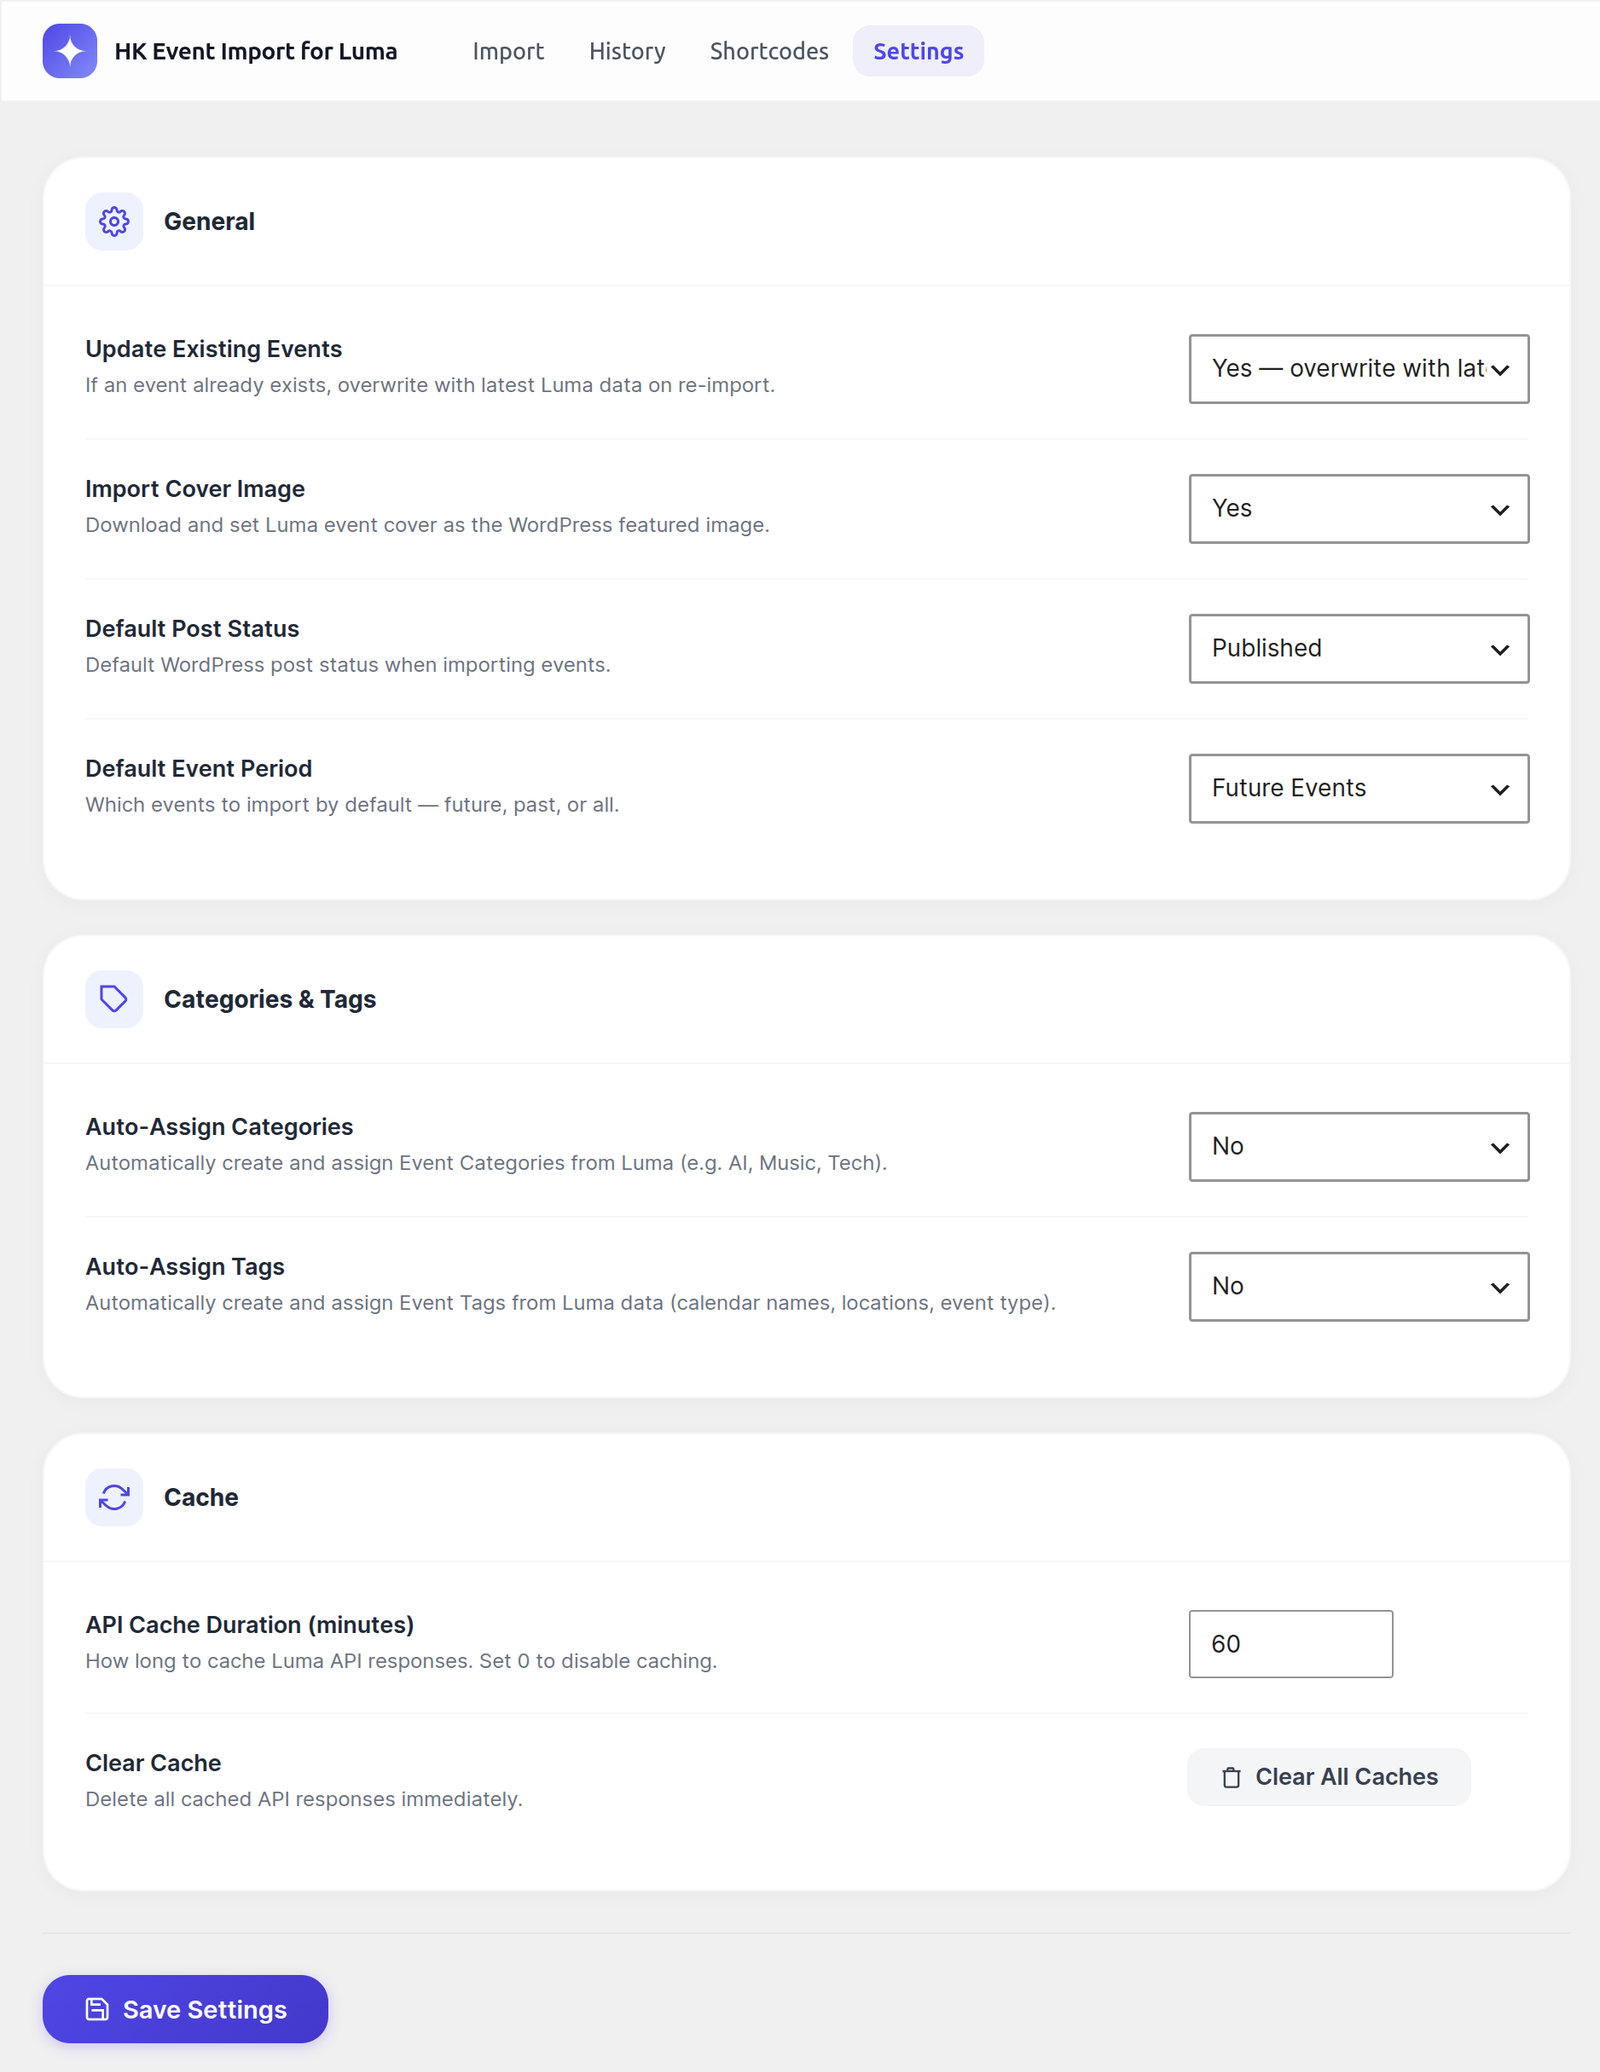
General Settings
– Update Existing Events: Select “Yes” if you want re-imported events to be updated with the latest Luma data. Select “No” to skip already imported events.
– Import Cover Image: Select “Yes” to automatically download the Luma cover image and set it as the WordPress Featured Image.
– Default Post Status: Choose if imported events should be Published instantly, set as Draft, or Pending Review.
– Default Event Period: Decide if you want to pull Future events, Past events, or All events by default.
Categories & Tags
– Auto-Assign Categories: Select “Yes” to create and assign Event Categories from Luma.
– Auto-Assign Tags: Select “Yes” to create Event Tags based on Luma data.
Cache Settings
– API Cache Duration: Specify how long (in minutes) to cache Luma API responses. This helps reduce external requests and speed up your site. Default is 60 minutes. Set to 0 to disable.
– Clear Cache Button: Click “Clear All Caches” to immediately purge cached data if you suspect event data is outdated.
> Note: Setting the Cache Duration to 0 will force a live API request on every import/update, which might result in slower performance.
Upgrade to HK Event Import for Luma Pro
Get access to premium features, faster updates, and dedicated support.
Was this article helpful?
Thanks for letting us know!